Tuesday, March 8, 2011

Cooking with an 8 year old - Chocolate Chip Muffins


All 3 of our kids love to cook and we love to watch the Food Network as a family.  This leads our children to often have Iron Chef contests when we cook and Big Sissy often narrates her cooking/baking and calls it "Cooking with an 8 year old."  So welcome to my new series... Cooking with an  8 year old.


So Big Sissy really loves Gal in the Middle's pumpkin chocolate muffins and wanted to take them to school for the Valentine's Day Party.  As much as I love the muffins too, I told her no, because I thought orange, pumpkin flavored muffins were probably not the right thing for Valentine's Day... it was just a hunch a I had. 

So using those muffins as inspiration, we went on a mission to find a chocolate chip muffin recipe.  Thanks to allrecipes.com and the reviews from previous bakers, we were able to find a pretty yummy chocolate chip muffin recipe; even though we still love Gal in the Middle's. 

Ingredients
2 cups all-purpose flour
1 cup white sugar
3 t. baking powder
1/2 t. salt
1 cup milk
1 t. vanilla
1/2 cup vegetable oil
1 egg
1 cup semi-sweet chocolate chips
3 T. white sugar
2 T. brown sugar

Directions
Heat oven to 400 degrees.  Line muffin tin with baking cups.

In medium bowl, combine flour, 1 cup sugar, baking powder, chocolate chips, and salt; mix well. 


In small bowl, combine milk, oil, and egg; blend well.


Add liquid ingredients all at once to dry ingredients; stir just until dry ingredients are moistened (batter will be lumpy).


Fill muffin cups 2/3 full. 


Sprinkle tops of muffins before baking with combination of 3 tablespoons sugar and 2 tablespoons brown sugar.


Bake for 18 minutes or until toothpick inserted in center comes out clean. 


Cool 1 minute before removing from plan. 


Enjoy!!


Photobucket

Friday, March 4, 2011

Farmer Fridays - Where can you buy our pork?


Where can you buy our pork is a question I often get asked by family members and friends so I thought I would address it for this week's Farmer Fridays

As a family farm, we sell the majority of our pigs to Tyson Foods who then distributes the pork in grocery stores across the country.  So there is a good chance when we sell our pigs to Tyson Foods in Indiana, our meat ends up in a grocery store near you especially if you are in the Midwest.    


Pork chops I recently purchased at our local Walmart ... could be ours.

My mother-in-law and I do sell a few pigs each year at the Farmer's Market in our local community as a way to educate others about modern pork production and to raise money to help pay for Big Sissy, Bubby, and Little Sissy's college.  (Have you seen what they are projecting college to cost in 10-15 years?  It's a little scary.)

Any way, I recently had a conversation with some individuals that asked me if I thought my pork (the pork we sell at the farmer's market) was safer and better than the pork they could buy at the local grocery store.  I have to admit I almost fell out of my chair because the fact of the matter is the pork at the grocery store is our pork.  Whether we sell a pig to Tyson Foods or through our local Farmer's Market, we provide that pig with the best care possible. 

We raise all of our pigs the same in climate controlled buildings that allow us to keep them comfortable year round and protected from the elements and predators.  We provide them with access to fresh water and feed, feed that we make for them ourselves in our own feed mill.  I often joke that we take better care of our pigs than we do ourselves as our veterinarian comes once a month for a routine herd visit and more often if needed.  I know that none of us are going to the doctor for a monthly check-up.  How about you? 

Raising pigs is our family's livelihood so taking care of them is our top priority just like it is for every other family farmer out there so just know that when you buy that pork chop, you are supporting family farms just like mine that have put a lot of care and hard work into getting that pork to your family's table.  So go ahead and Be Inspired by Pork the next time you cook. 
Photobucket

Friday, February 25, 2011

Farmer Fridays - It all started with a lamb or two


Although I'm sometimes known as the proud pork mom and love me some pigs and pork, my 4-H livestock career began with 2 lambs and actually a few rabbits.  Although my mom had grown up on a hog farm and both of my parents showed pigs in 4-H, when I started 4-H at age 10,we didn't really have a place to keep pigs, but we thought we could make it work with a few lambs, Chip and Dale.   (Real creative I know.)  Eventually, it would work out that I would be able to show pigs in 4-H, but it all started with sheep.

Now that being said, I will admit I have never been a fan of lamb so I was a bit nervous when it was announced that the secret ingredient of Ott, A's February Iron Chef Challenge would be lamb.  But I was up to the challenge especially since it was lamb chops and I had never tried lamb chops.  

So now I was on a mission much like I was with the duck challenge of January to find an easy to prepare, kid-friendly recipe.  Thanks to allrecipes.com I think I succeeded and with my good friend, Leah at Beyer Beware, as inspiration and the hints on the website, I even made a few tweaks to the recipe.

Baked Lamb Chops - Ingredients
3 eggs
1 1/2 t. Worcestershire sauce
1 1/2 t. Soy sauce
12 (5.5 oz.) lamb chops
2 cups dry bread crumbs
garlic powder 
freshly cracked black pepper
fresh parsley

Now I started with 4 lamb chops, so I cut the recipe back by 2/3 and only used one egg, a 1/2 teaspoon of each of the sauces, and about a cup of breadcrumbs.  


So before I did anything, I preheated the oven to 375 degrees.

Then in a medium bowl, combine the egg and Worcestershire sauce and Soy sauce; stir well.


Dip each lamb chop in the egg/sauce mixture.


Then lightly dredge in the bread crumbs.  (Since my breadcrumbs were not flavored, I added some garlic powder to the bread crumbs prior to dredging the lamb chops.)


Then arrange chops in a 9x13 baking dish and top with freshly cracked black pepper.  


Bake at 375 degrees for 20 minutes, turn chops over, and cook for 20 more minutes, or to desired doneness.  (Now based on some of the tips on the website, I did line my baking dish with foil, but I don't know if I would recommend this as some of my breading from the chops stuck to the foil.)

After baking for first 20 minutes

Pretty easy if you ask me.  

Now last night was a weird night at this pig pen as Big Sissy was asleep by 5:30pm as she came home from school complaining of a sore throat.  (When she woke up at 8:15pm, we headed to urgent care where she was diagnosed with strep throat.  Not fun, but I'm glad we went last night as she just woke up this morning and is already like a new kid.)  Bubby fell asleep on the couch before dinner was ready as he has had 2 busy days of hanging out with Cousin N and Cousin E.  So it was just Little Sissy, The Farmer, and me to try the lamb chops.  We really didn't know what to do in such a quiet house.

Baked Lamb Chop with Fresh Parsley Garnish

Any way, the lamb chops were a hit; although, The Farmer did ask if I could try the recipe with pork chops next time.  So it wasn't a complete conversion with The Farmer, but thanks again to Ott,A for making us live outside our comfort zone once again.

And be sure to check back in 2 weeks from today, as Ott,A, will be doing a guest blog right here for Farmer Fridays.  In the mean time, if you want to learn more about sheep or lamb, be sure to check out her blog as it is full of information.  

Photobucket


Photobucket


Thursday, February 24, 2011

I'm still alive...

Believe it or not, I'm still alive despite the fact I haven't blogged in almost 2 weeks and have taken to vicariously living through my friends since my full-time, off-farm job has kept me busier than normal the last few weeks.  Thankfully, I did get to spend some time with Martini last week so that is a major plus if I have to be away from home.

So while I've been busy and out of town with work a lot, some of my fellow Real Farmwives of America & Friends have been quite busy.  Cris, Leah, Megan, Liz, and Marybeth went on the field trip of a lifetime to meet the one and only, The Pioneer Woman.

I had never blogged a day in my life and had read very few of them before my good friend, Leah, introduced me to The Pioneer Woman and ever since then I was hooked and soon starting blogging myself.

So although I didn't get to meet her, I'm glad that they did and hopefully next time my busy work schedule won't keep me away from a fun field trip with my fellow Farmwives.

Although I hate to jinx myself I do think I might be able to the light at the end of the tunnel in regards to the busier than normal work schedule, but I know I've said that before so we'll just take it one day at a time.  But don't ask me about my kitchen table ... it's seen better days.
Photobucket

Friday, February 11, 2011

Farmer Fridays - Guest Post from Alarm Clock Wars


Today is a special Farmer Fridays as it is a guest post from one of my fellow Real Farmwives of America & Friends, Marybeth from Alarm Clock Wars.  Marybeth is a pretty amazing woman as she is not only a farmwife, but she is a veterinarian and always has a great adventure to share.  Today's guest post does not disappoint, but it does have some graphic photos of a C-section on one of her cows so be prepared.


About two weeks ago, we needed to help.

{Quick disclaimer – some of the pictures might be a little on the graphic side. Cows in labor are messy!}


One of our first calf heifers was going into labor.


(A first calf heifer has not had a baby yet. She was bred and got pregnant when she was just over one year old. Cattle gestation is 9-10 months, and this heifer is 23 months old now.)

Hubby Doc found her in first stage labor around 7:30am. He had to go to work, so he asked me to keep an eye on her for the next few hours and let him know what was going on. Cattle can be in first stage labor (before the mother starts pushing and the baby starts coming out) for up to 12 hours, so we weren’t too worried at this stage of the game.

The bag hanging down is part of the placenta. This is filled with fluid, and starts to detach in the first stage of labor. In cows, this can last a long time, but this is not in many other species. If you have a pregnant animal, call your veterinarian so you know what to expect when it’s time for the baby to be born!

I kept an eye on our new momma through the morning, and she wasn’t making any progress.


Hubby Doc always comes home for lunch, and it just happens that he had this afternoon off. So when he got home from work, we got this lady into the barn for an exam.


 From here, we did a vaginal exam to see if the calf was still alive, and if he was coming in the right position. Hubby Doc could feel both front legs pointed in the right direction, but the baby was turned to the side. When he gave a tug on a foot, the calf kicked back!

Hubby Doc got chains wrapped around both front legs to try to pull the baby out.


The chains get wrapped around the lower part of the leg, above the hoof. There is a special way to wrap the chains so you don’t pull too hard on the leg and hurt the calf.

  
As we pulled on the legs, we realized the calf was twisted farther than we thought. The yellow part of the hoof should be facing down towards the ground, not up towards the cow’s tail. The calf’s head was also arched back, and we couldn’t get the head looking the right way. We could also tell (by the size of the feet and the feel of the head) that this was going to be a big calf, from a small heifer.

{That yellow stuff on the feet is soft, and covers the bottom of the baby’s hooves. This is to protect momma during gestation. It gets worn of the hooves as the baby learns to walk.}

We decided the best thing to do, for both the momma and the baby, was a Cesarean section.

Many farmers will try to pull calves themselves. They have learned from their veterinarian how to put on chains, and what to feel for. However, when they get to this point, they will call a veterinarian to do the surgery.

So far, we have not given this heifer any medications. Sometimes, epidural anesthesia can be helpful to get a cow through a painful labor. This heifer had not been in second stage labor very long (actively trying to get the calf out), and she was not in excessive pain. Also, we wanted her to try and push to help us get the calf out. With an epidural, they will not push.

At this point, we used lidocaine as a local anesthetic to numb the area where Hubby Doc was going to make the incision for the C-section. (This is similar to Novocain you get at the dentist.)


We did not sedate our heifer for this surgery. If you sedate cattle, they will try to lay down. Since we were getting ready to open her abdominal cavity, we did not want her to lay down on the dirt floor of the barn. This would have gotten dirt inside her abdomen, which would have made her very sick. With good local anesthesia, and a quiet environment, cattle will stand still during a surgery like this.

After we gave the local anesthesia a few minutes to take effect, Hubby Doc started surgery. Here, he is pulling the uterus towards the body wall so he can have easier access to the calf inside.


He made an incision in the uterus, and we pulled the calf out!


We laid him down on the barn floor, so he got pretty dirty right away. He had some bleeding from his umbilicus (common with C-sections), and I put a clamp on it for a little while to stop the bleeding.


 By the time the surgery was finished, momma had licked her new baby pretty dry, and he was trying to stand up already!

New kiddo is an 87-pound bull (male) calf. As far as beef calves go, he’s actually about average size. But his momma was on the small side, and he was not trying to be born in the right position. Between him being a little big, and her being a little small, and the malpositioning, a C-section was the right decision for this pair.

Momma cow has a pretty line of sutures in her side. These will get taken out about 14 days after surgery. We also gave momma some pain medications and antibiotics after surgery. She will stay on these medications for 5-7 days.


Baby got some new jewelry. All the cows on our farm get ear tags. This is how we identify each individual animal. Hubby Doc can tell the cows apart from across the field, but for the most part I think one cow looks like most other cows. Getting ear tags is just like getting your ears pierced. Quick and it’s done!


This baby’s number is 1F03. That means he was the third baby born on the Feutz farm in 2011. His momma is 9F09 (ninth baby born on the Feutz barn in 2009). We also put the baby’s birthday and his momma’s number on the tags. We nicknamed him Charlie.

One week after his birth, and momma and Charlie are doing well! We kept them separate from the rest of the cows so we could give momma her medications easier and so we could keep an eye on the new baby. This weekend, they will get turned out with the rest of their friends!

Want to hear more about cows, what it’s like to be a veterinarian, or have some questions? Come see me at http://alarmclockwars.blogspot.com sometime. I blog about our farm, our cows, being a veterinarian, my daily battles with my alarm clock, and living in southern Indiana. I’d love to have you for a visit!


Thanks Mary Beth!


Photobucket

Monday, February 7, 2011

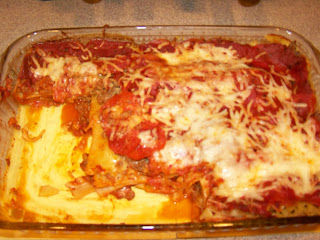
Sausage and Pepperoni Pizza Casserole

When The Farmer and I got married over 10 years ago, my co-workers at the time gave us a recipe box full of recipes from each of their families.  It was a great gift and the recipes are even better.

One of The Farmer's favorites has always been sausage and pepperoni pizza casserole.  It is pretty easy to make, but I will admit, I haven't made it in a long time.  So it was a blessing in disguise that I had been planning to make it prior to the Ice Storm of 2011 and had all of the ingredients on hand when we were iced in at home.  I thought it would be the perfect meal to reward him for working so hard to prepare our family farm for the predicted weather. 

Unfortunately the thought of taking pictures while I was making this didn't really enter my mind until we had already started eating so you will just have to use your imagination.

Ingredients
1 pound ground Italian sausage
12 oz. lasagna noodles (cook according to package directions or use the ready-to-bake noodles)
2 (14oz.) jars of pizza sauce
2 cups mozzarella or cheddar cheese
6 oz. sliced pepperoni

Directions
Brown and drain sausage.  In large lightly greased casserole dish, layer half of the noodles, sausage, pepperoni, sauce, and cheese.  Repeat with second layer of noodles, sausage, pepperoni, sauce, and cheese, reserving several pepperoni slices to garnish the top.  Bake at 350 degrees for 35-40 minutes.

Enjoy!


Hunk of Meat Mondays

Photobucket

Sunday, February 6, 2011

A Smile is What It's All About

A smile is what it's all about.  There is a lot of truth this, but I had never quite thought about it like this until I heard a grandmother say it at church today.

There was a young couple sitting in front of us with their approximately 6 month old baby.  This baby girl was so cute.  She was smiling and cooing with everyone around her.  The above referenced grandmother and her grandson were sitting directly next to the baby and her parents.  The grandmother was encouraging the baby to smile by smiling back at her.  Her grandson was not quite into this whole smile at the baby trick and decided not to smile.  His grandmother then proceeded to tell him to smile at the baby as "that is what church is all about."

I couldn't help but smile myself.

What a great explanation of God's love for us.
Photobucket
Related Posts Plugin for WordPress, Blogger...
 
Web Analytics